How to Build a Camera to Cloud Workflow
Camera to cloud is a production workflow where footage uploads directly from the camera to cloud storage, enabling real-time collaboration between on-set crews and remote editors. This guide explains how to implement this workflow to reduce turnaround times by up to 50%, regardless of your camera budget. You will learn both the high-end hardware approach and the more accessible nearline method that works with any camera.
What is Camera to Cloud?
Camera to cloud (C2C) is a technology workflow that moves footage from the camera to the post-production team over the internet, often while the camera is still rolling. The concept has existed since the early 2010s, but only became practical for most productions after 2020 when bandwidth costs dropped and cloud infrastructure matured.
In a traditional production pipeline, a data wrangler offloads camera cards to hard drives at the end of each shooting day. Those drives get shipped via courier to the post facility, where they sit in a queue until someone ingests them into the editing system. Depending on location and logistics, editors might wait three to five days before seeing a single frame. With camera to cloud, that timeline collapses. Editors can start assembling rough cuts within minutes of "cut" being called.
The term "dailies" becomes a misnomer when footage arrives continuously throughout the day. Some production teams now call them "instants" or simply "takes" since the delay between capture and review has effectively disappeared.
Camera to cloud solves three persistent production problems:
- Speed: Editors can start cutting scenes while the crew is still on location. If a take has a technical issue, the team catches it the same day rather than discovering it during post.
- Backup: Footage is backed up off-site immediately. If a camera card fails, gets lost, or is stolen, the cloud copy survives.
- Remote access: Directors, producers, clients, and investors can view shots from anywhere without being physically present on set.
The workflow represents a fundamental shift in how productions think about post. Instead of treating editing as a phase that starts after principal photography wraps, teams can now treat capture and post as parallel activities.
How Camera to Cloud Works
Every camera to cloud implementation follows the same three-step process, though the specific hardware and software varies by budget and production scale. Understanding each step helps you identify where to invest and where to save money.
1. Capture and Encode
As the camera records high-resolution raw files to its internal media (CFast, CFexpress, or SSD), a connected device simultaneously creates a lightweight proxy file. These proxies are typically H.264 or H.265 encoded at 1080p or lower resolution, optimized for web transmission rather than final delivery.
On high-end setups, the camera itself or a dedicated encoder handles this transcoding in real-time. The Teradek Cube encoder, for example, attaches to the camera's SDI or HDMI output and generates a proxy stream alongside the original recording. The RED V-Raptor and some Arri models support native C2C integrations that handle encoding internally.
For budget-conscious productions, the proxy generation happens after the fact. A DIT workstation transcodes clips as they are offloaded from cards, creating upload-ready files within seconds of ingest.
2. Upload
The device connects to the internet through whatever path is available. On-location shoots might use LTE or 5G cellular connections via portable hotspots. Studio productions connect through standard ethernet or Wi-Fi. Remote shoots sometimes rely on satellite uplinks, though latency becomes a factor.
Smart upload protocols make a significant difference here. If a connection drops mid-transfer, the upload should resume from where it stopped rather than starting over. Fast.io and similar platforms handle this automatically. A 2GB proxy file interrupted at 1.8GB will resume from that point once connectivity returns.
Upload bandwidth requirements depend on your proxy settings. A 1080p H.264 file at 10 Mbps runs about 4.5GB per hour of footage. With a 50 Mbps upload connection, you can transfer that hour of footage in about 12 minutes. Cellular connections in the 15-25 Mbps range extend that to 30-40 minutes per hour of material.
3. Sync and Edit
The cloud platform receives the uploaded files and immediately makes them available to authorized users. Editors receive notifications when new clips arrive and can drag them directly into their timeline. Since proxy filenames and timecode match the original camera files exactly, these lightweight editing copies can be swapped for full-resolution originals later in the process.
This relink workflow is standard practice in professional post-production. Editors cut using proxies, then the assistant editor relinks to the camera originals (often called O-Negative or OCN) before color grading and final delivery. The proxy-to-original connection relies on matching clip names and timecode, so maintaining consistent file naming on set is essential.
Accessible vs. Enterprise Camera to Cloud
When production professionals hear "camera to cloud," many assume it requires a RED or Arri camera body, a $3,000 Teradek encoder, and a Frame.io subscription. That represents one approach, and it works well for productions with substantial equipment budgets. But it is not the only path to achieving the same workflow benefits.
The Enterprise Approach (Hardware-Integrated)
High-end productions use cameras with native C2C support paired with dedicated encoding hardware. A typical setup might include a RED V-Raptor or Arri Alexa Mini LTE, a Teradek Cube 755 encoder, and a Frame.io Camera to Cloud subscription. The encoder connects via SDI and generates proxies automatically as the camera rolls. Footage flows to Frame.io without anyone touching a card or clicking a button.
Advantages of the enterprise approach:
- Fully automated with zero manual intervention
- Proxies upload while the camera is still rolling
- Invisible to camera operators and DITs
Disadvantages:
- Hardware costs between $3,000 and $8,000 for the encoder alone
- Monthly data costs can exceed $1,000 on productions with heavy shooting schedules
- Proprietary ecosystem creates vendor lock-in
- Limited camera compatibility
The Accessible Approach (Nearline Upload)
You do not need a $50,000 camera to benefit from cloud workflows. A DIT or data wrangler offloads cards to a laptop as normal, and that laptop syncs immediately to a fast cloud platform. The footage reaches editors within 15-30 minutes of capture rather than instantaneously, but the practical difference is minimal for most productions.
Advantages of the nearline approach:
- Works with ANY camera: Sony, Canon, Blackmagic, Panasonic, even smartphones
- Total hardware cost under $200 (fast card reader plus existing laptop)
- Uses standard internet connections without specialized data plans
- No proprietary ecosystem or vendor lock-in
Disadvantages:
- Requires a manual offload step, though you perform this anyway for backup purposes
- Footage arrives in batches rather than continuously
- Someone must manage the upload process
For documentary, commercial, and independent narrative productions, the nearline approach delivers 90% of the benefits at 10% of the cost. By using a reliable cloud platform like Fast.io, productions can achieve the same collaborative advantages without investing in specialized hardware.
Benefits of a Cloud-First Production Pipeline
Adopting camera to cloud changes how production teams operate on a daily basis. The benefits extend beyond simple time savings into improved creative outcomes and reduced risk.
Faster Post-Production Turnaround
Remote editing teams have grown significantly since 2020. According to industry surveys, more than 60% of editors now work remotely at least part of the time. When editors can access footage during the shoot, they catch continuity errors, focus issues, and technical problems while the crew is still on location. This prevents expensive reshoots that might otherwise not be discovered until weeks later during post.
A typical commercial production saves two to three days per week of shooting by enabling same-day editorial review. Multiply that across a two-week shoot, and the production gains nearly a week of time that would otherwise be lost to courier delays and ingest queues.
Reliable Off-Site Backup
Hard drives fail. Couriers lose packages. Luggage gets stolen. Every production veteran has a horror story about lost footage. Uploading to the cloud immediately after capture creates an off-site backup without requiring extra steps in the workflow.
The cost of lost footage goes beyond reshoots. Depending on talent schedules, location availability, and weather windows, a lost shooting day might be impossible to recreate at any price. Cloud backup provides insurance against these catastrophic scenarios.
Work From Anywhere Collaboration
A director in London can review takes from a second unit in Tokyo in real-time. Producers on another project can check in on progress without traveling to set. Clients can approve shots the same day they are captured rather than waiting for a weekly review session.
What was once reserved for blockbuster productions with dedicated satellite uplinks is now available to independent creators shooting on mirrorless cameras. The democratization of cloud infrastructure has made distributed production teams practical at any budget level.
Better Creative Decisions
When footage reaches the editorial team quickly, creative decisions improve. Directors can see how scenes are cutting together while they still have the opportunity to capture additional coverage. Editors can request specific shots while the camera is still on location. The feedback loop between capture and post tightens from days to hours.
Setting Up Your Workflow with Fast.io
Fast.io handles the massive file sizes and speed requirements that camera to cloud workflows demand. The platform was built for teams working with large media files, making it well-suited for video production use cases. Here is a step-by-step setup process.
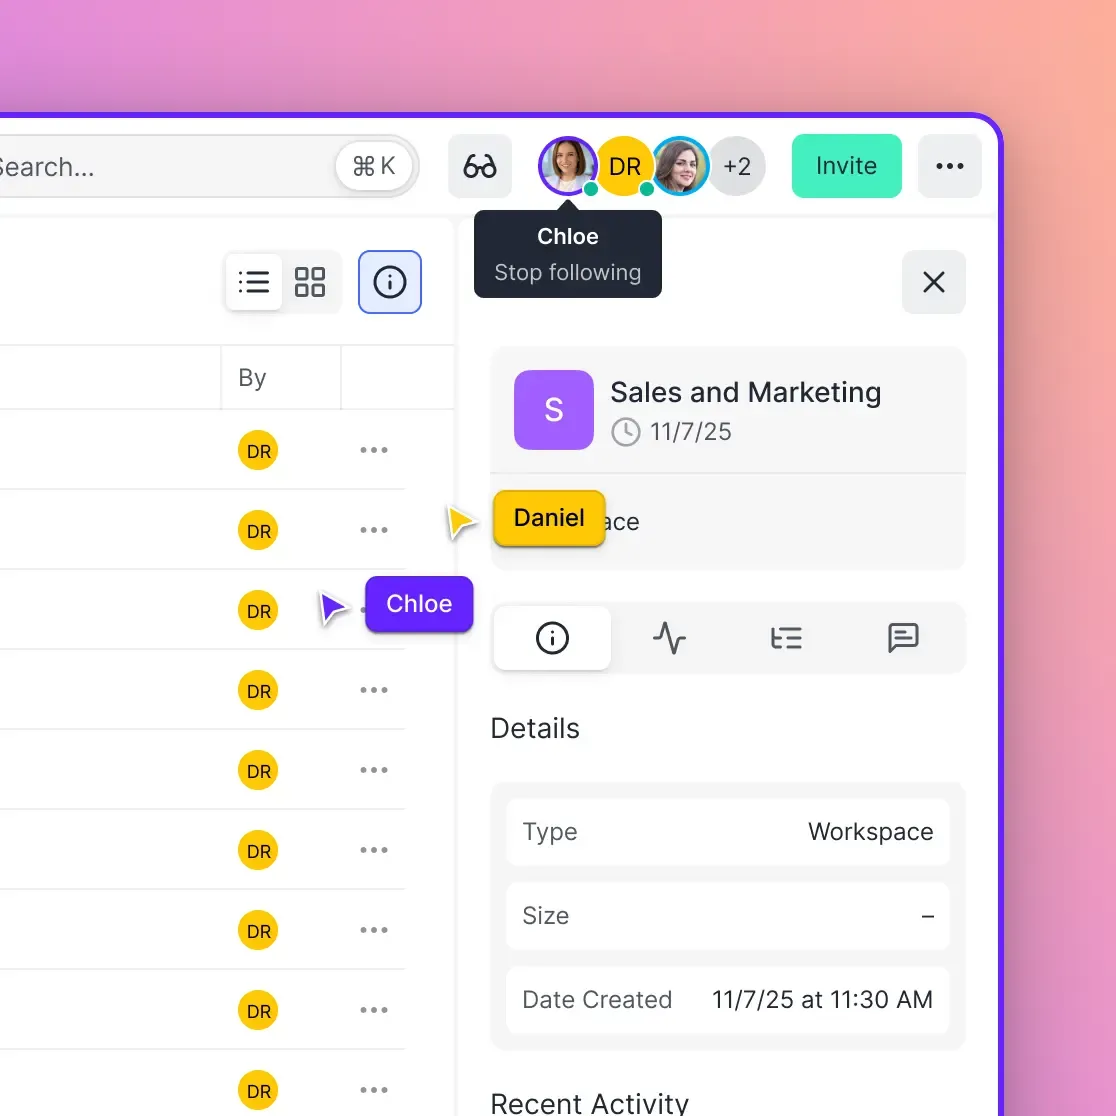
Step 1: Create a Project Workspace
Set up a dedicated workspace for your production. Unlike personal cloud drives, Fast.io workspaces are organization-owned, which means files remain accessible even if individual team members leave the project. This matters on productions where freelance DITs, editors, and assistants cycle through at different phases.
Name your workspace with the production title and date range (e.g., "ACME Commercial - Jan 2026") so it remains identifiable months later when you need to retrieve archival footage.
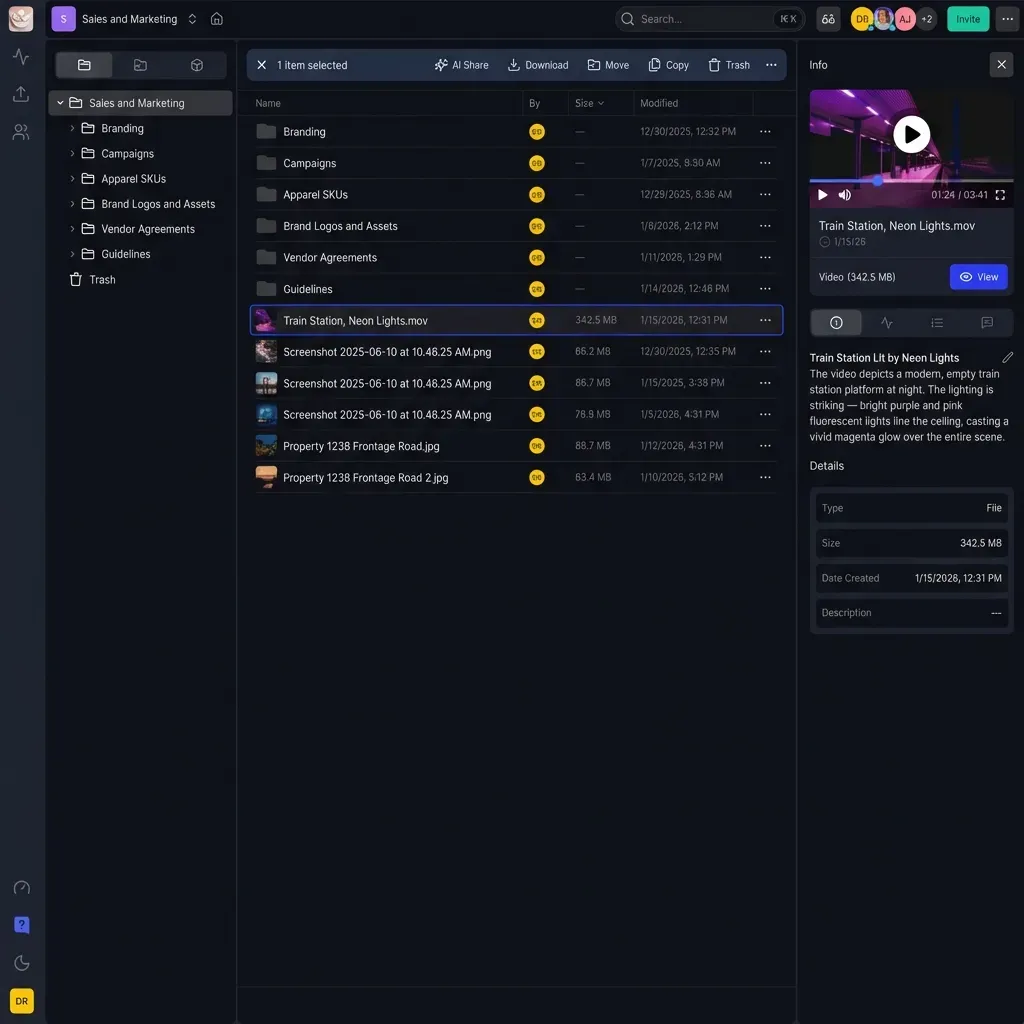
Step 2: Configure Folder Structure
Establish a consistent folder hierarchy before the first day of shooting. A typical structure might include:
- Dailies - Raw camera files organized by shooting day
- Proxies - Transcoded editing copies
- Selects - Marked favorites for director and client review
- Audio - Production sound and music
- Documents - Scripts, call sheets, release forms
Consistent structure across productions makes it easier for editors and assistants to navigate projects without needing custom orientation for each job.
Step 3: Connect Your Ingest Station
On set, your DIT or data wrangler connects their laptop to the Fast.io workspace using the desktop application or web interface. Fast.io's cloud-native architecture handles uploads without file size limits, which matters when working with 4K and 8K footage that produces individual files exceeding 100GB.
Configure the sync to run automatically when new files appear in the local watch folder. As the DIT offloads cards, transcoded proxies flow to the cloud without additional manual steps.
Step 4: Invite Your Post Team
Add editors, assistant editors, producers, and directors to the workspace with appropriate permission levels. They do not need to download anything to start reviewing footage. Fast.io's Universal Media Engine enables HLS streaming directly in the browser, so team members can scrub through clips instantly to verify shots before downloading the proxies or source files they need.
Browser preview eliminates the "download and wait" cycle that slows down traditional workflows. An editor can scan through an entire day of footage in the browser, identify the takes worth downloading, and then pull only those files to their local edit system.
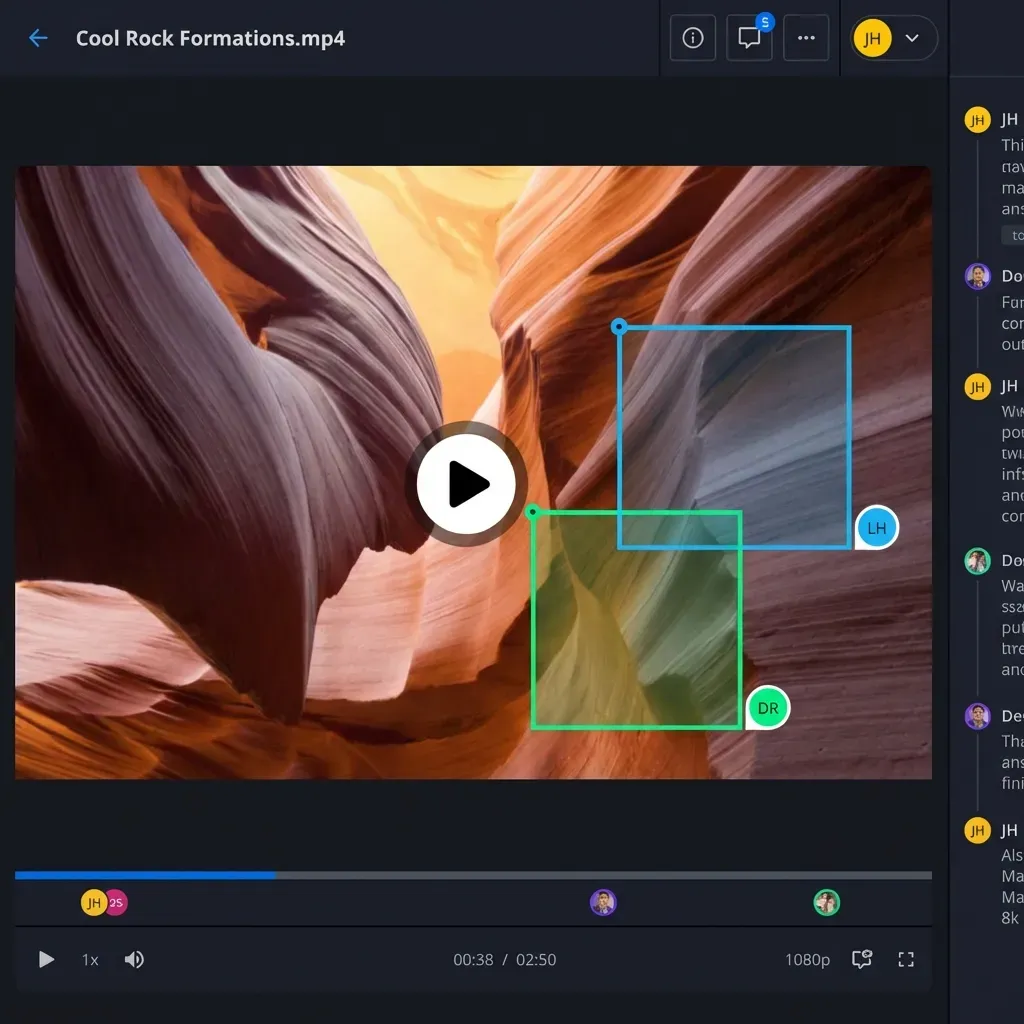
Step 5: Enable Real-Time Review
Use frame-accurate comments to mark "good takes" or flag issues directly on the video timeline. This metadata travels with the project file, keeping communication clear and reducing the back-and-forth that happens when notes exist in separate documents or email threads.
Directors can circle a specific frame and write "Focus soft here" rather than describing timecode in a text message. Editors see these annotations in context and can address issues without guessing what the note refers to.
Bandwidth and Technical Requirements
Successful camera to cloud implementation requires adequate internet connectivity on location. Before committing to this workflow, evaluate your bandwidth options and plan accordingly.
Upload Speed Requirements
The minimum practical upload speed for proxy-based workflows is 10 Mbps sustained. At this speed, an hour of 1080p proxy footage (approximately 4-5GB) takes about 45-60 minutes to transfer. While not instantaneous, this still delivers footage to editors the same day.
For a more comfortable workflow, target 25-50 Mbps upload speed. At 50 Mbps, that same hour of proxy footage transfers in about 12-15 minutes, fast enough that footage arrives at post before the next setup is ready to shoot.
Uploading full-resolution camera originals (rather than just proxies) requires significantly more bandwidth. A single hour of 4K ProRes footage can exceed 100GB. At 100 Mbps upload, that takes over two hours to transfer. Most productions upload proxies during the shoot and ship physical drives for the originals, combining the speed benefits of C2C with the reliability of physical media.
Connectivity Options by Location
Studio/Stage: Ethernet connections provide the most reliable bandwidth. Studios often have fiber internet with 100+ Mbps upload speeds, making full-resolution uploads practical.
Urban Locations: LTE and 5G cellular connections typically provide 15-50 Mbps upload in metropolitan areas. Portable hotspots from carriers like Verizon, AT&T, or T-Mobile work well for proxy workflows.
Rural/Remote Locations: Cellular coverage becomes spotty outside urban areas. Starlink and other satellite internet services provide 10-25 Mbps upload speeds in most locations, which is adequate for proxy workflows though latency is higher.
International Shoots: International cellular data can be expensive. Research local SIM cards or portable WiFi rental options before traveling. Many productions establish a local internet connection at base camp and shuttle cards back for upload rather than relying on cellular from every location.
Estimating Data Costs
A production shooting 4 hours of footage per day generates roughly 20GB of proxy files at standard settings. Over a 10-day shoot, that totals 200GB of upstream data. At typical cellular rates of $10-15 per GB for international roaming, costs can escalate quickly. Plan for dedicated data budgets or local connectivity solutions to avoid surprise charges.
Common Mistakes and How to Avoid Them
Camera to cloud workflows fail for predictable reasons. Understanding these pitfalls helps you design a more resilient system from the start.
Mistake 1: Inconsistent File Naming
The proxy-to-original relink process depends on matching clip names and timecode. If your camera generates clips named "A001_C001.mov" but your transcoding software renames them "Day1_Take1.mov," the connection breaks. Editors cannot relink to originals without manual intervention.
Solution: Configure all software in your pipeline to preserve original camera clip names. If you must add prefixes or suffixes, ensure the original filename remains intact as part of the new name.
Mistake 2: Overcommitting to Bandwidth
Productions sometimes assume cellular or satellite connections will perform at their advertised maximum speeds. A "50 Mbps" LTE connection might deliver 5 Mbps during peak hours or in areas with congested cell towers.
Solution: Test connectivity at your actual locations before the shoot. Run speed tests at different times of day. Have a backup plan (physical drive shipping) if connectivity falls short.
Mistake 3: Neglecting Local Backup
Cloud upload does not replace local backup. If an upload fails partway through and the original card gets reformatted, that footage is lost.
Solution: Maintain your standard two-drive local backup protocol. Cloud upload is an additional backup layer, not a replacement for proven on-set data management practices.
Mistake 4: Missing Permissions Configuration
Productions often share workspaces too broadly, giving clients or investors access to raw footage before it has been reviewed and vetted. A director might not want producers seeing every failed take.
Solution: Create separate folders or workspaces for different access levels. "Internal Dailies" for the post team, "Selects" for producers and clients. Configure permissions at the folder level to control who sees what.
Mistake 5: Ignoring Time Zones
When your shooting crew is in one time zone and your post team is in another, same-day delivery can be confusing. Is "Day 2 Dailies" based on the shooting location date or the post facility date?
Solution: Standardize on a single time zone for all folder naming and communication. Many productions use the shooting location time zone to avoid confusion about which footage belongs to which day.
Frequently Asked Questions
Do I need a specific camera for camera to cloud?
No. While cameras like RED V-Raptor and Arri Alexa have built-in C2C integrations, you can create a camera to cloud workflow with any camera. The nearline approach uses a DIT station to transcode and upload proxies as cards are offloaded. This works with Sony, Canon, Blackmagic, Panasonic, and even smartphone footage. The key requirement is a reliable upload connection and a cloud platform that handles large files.
How fast does my internet need to be for camera to cloud?
For uploading proxy files, a consistent 10-20 Mbps upload speed is sufficient. At 20 Mbps, an hour of 1080p proxy footage transfers in about 30 minutes. For uploading full-resolution original files, you need 50-100 Mbps or higher, which typically means fiber internet or bonded connections. Most productions upload proxies during the shoot and ship originals on physical drives.
Is camera to cloud secure?
Cloud-based workflows are often more secure than shipping physical drives. Cloud platforms encrypt data in transit and at rest. With Fast.io, you get granular permissions that control exactly who can access dailies versus final cuts. Audit logs track every view, download, and permission change. Physical drives, by contrast, can be lost, stolen, or duplicated without any tracking.
What is the difference between proxies and original files?
Original files (often called O-Neg or OCN) are the raw, high-resolution footage captured by the camera. These files are typically very large, often 50-200 Mbps or higher. Proxies are lower-resolution, smaller copies created specifically for editing efficiency. Proxies might be 10-20 Mbps H.264 files that match the frame rate and timecode of the originals. Editors cut using proxies for speed, then relink to originals for color grading and final delivery.
Can I use camera to cloud for documentary shoots?
Documentary productions benefit significantly from camera to cloud. Run-and-gun shooting styles generate large amounts of footage that needs to be reviewed quickly. A story producer back at the office can watch footage the same day it is shot and provide direction for the next day of shooting. The nearline approach works particularly well for documentary since productions rarely have dedicated DITs.
What happens if my internet connection drops during an upload?
Modern cloud platforms like Fast.io use resumable upload protocols. If your connection drops at 80% completion, the upload picks up from that point when connectivity returns. You do not lose progress or need to restart from the beginning. This matters particularly for cellular connections in areas with inconsistent coverage.
Related Resources

Start Your Camera to Cloud Workflow
Upload dailies as you shoot, share with editors in real-time, and cut your post-production timeline with Fast.io.