How to Connect OpenClaw to Home Assistant on Raspberry Pi
The OpenClaw Home Assistant integration uses the ha-mcp skill to give AI agents natural language control over smart home devices through the Model Context Protocol. This guide covers the full setup on a Raspberry Pi 5: installing Home Assistant, creating access tokens, configuring the ha-mcp skill, hardening the gateway, and using Fast.io workspaces to store and share automation configs across your agent fleet.
What OpenClaw Brings to Home Assistant
Home Assistant already automates your home. It connects Zigbee bulbs, Z-Wave locks, Wi-Fi plugs, Matter sensors, and hundreds of other devices into a single control plane. The limitation is the interface: you either tap through dashboards, write YAML automations by hand, or shout at a voice assistant that understands maybe 60% of what you say.
OpenClaw changes the interaction model. Instead of navigating menus or memorizing entity IDs, you type (or speak) natural language commands: "Turn off all the lights downstairs," "Set the bedroom to 21 degrees," or "What's the humidity in the garage?" The ha-mcp skill translates these into Home Assistant service calls through the Model Context Protocol, giving the agent structured access to every entity your HA instance exposes.
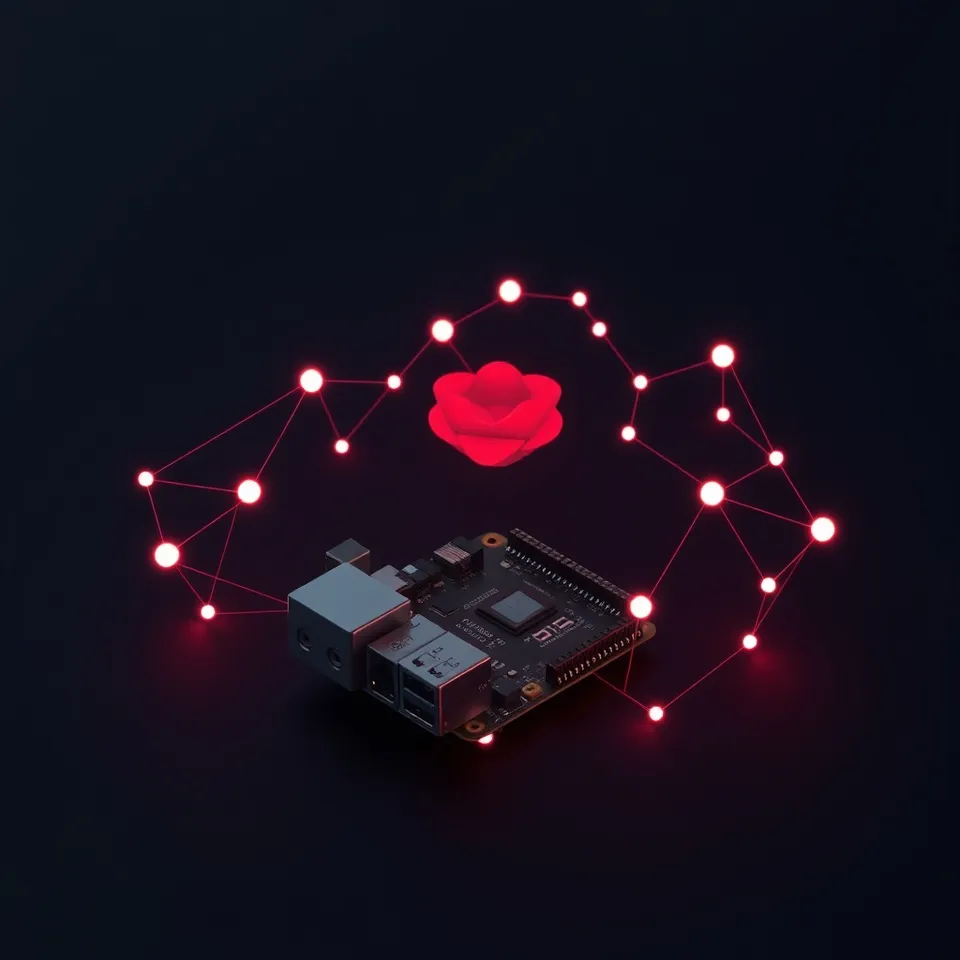
The combination works especially well on a Raspberry Pi. A Pi 5 with 8GB of RAM runs both Home Assistant OS and the OpenClaw gateway comfortably, and the total hardware cost stays under $100 when paired with a Zigbee coordinator like the SONOFF ZBDongle-P or ZBDongle-E. The Pi handles orchestration while a cloud LLM (Claude, GPT-4, Gemini, or any supported provider) handles the reasoning. Your Pi draws under 5W at idle, which translates to a few dollars per year in electricity.
This is not a cloud-dependent setup. Home Assistant runs locally, your device data stays on your network, and the only outbound traffic is the LLM API call itself. OpenClaw acts as a relay, not a middleman.
What to check before scaling openclaw home assistant
Before starting, gather everything you need. The setup has two sides: the Home Assistant installation and the OpenClaw gateway.
Hardware:
- Raspberry Pi 5 (8GB RAM). The Pi 4 (8GB) works but the Pi 5 offers faster CPU throughput and better NVMe I/O
- MicroSD card (32GB minimum) or NVMe SSD via a HAT. SSD is preferred for reliability on a device running 24/7
- USB-C power supply (27W official Pi 5 supply recommended)
- Zigbee coordinator (SONOFF ZBDongle-P or ZBDongle-E) if you plan to use Zigbee devices
- Ethernet cable or stable Wi-Fi connection
Software:
- Home Assistant Operating System (HAOS) flashed to your Pi's storage
- An OpenClaw account with gateway access
- An API key for your chosen LLM provider (Anthropic, OpenAI, Google, or another supported option)
Accounts and tokens you will create during setup:
- A Home Assistant Long-Lived Access Token
- An OpenClaw gateway token for authentication
The total hardware cost for a Pi 5 8GB, a case, power supply, SSD, and a Zigbee coordinator comes in under $100 if you shop around. If you already run Home Assistant on a Pi, you only need to add the OpenClaw gateway, and the marginal cost is zero.
Install Home Assistant and Create an Access Token
If you already run Home Assistant, skip to the token creation step. Otherwise, start by flashing Home Assistant OS to your Pi.
Download the HAOS image for Raspberry Pi 5 from the Home Assistant installation page. Use Raspberry Pi Imager or Balena Etcher to write the image to your SSD or SD card. Insert the storage, connect Ethernet if available, and power on the Pi. Home Assistant takes a few minutes to boot for the first time.
Open a browser and navigate to http://homeassistant.local:8123. Walk through the onboarding wizard: create your admin account, set your location and time zone, and let HA discover devices on your network. If you have a Zigbee coordinator plugged in, HA should detect it and prompt you to set up ZHA (Zigbee Home Automation) or install the Zigbee2MQTT add-on.
Once onboarding is complete, create a Long-Lived Access Token for OpenClaw:
- Click your profile icon in the bottom-left corner of the HA dashboard
- Scroll down to the "Long-Lived Access Tokens" section
- Click "Create Token"
- Name it something identifiable like "OpenClaw Agent" so you can find and revoke it later
- Copy the token immediately. Home Assistant only shows it once
This token gives OpenClaw the same permissions as your user account. If you want to restrict what the agent can access, create a separate Home Assistant user with limited permissions and generate the token from that account instead. This is a good practice for security: give the agent access only to the rooms and device types it needs.
Store the token somewhere safe. You will need it in the next step when configuring the ha-mcp skill.


Give Your Smart Home Agent Persistent Storage
Fast.io workspaces let OpenClaw agents store configs, share automation files, and sync across devices. 50GB free, no credit card, with MCP access built in. Built for openclaw home assistant workflows.
Configure the ha-mcp Skill in OpenClaw
The ha-mcp skill is what bridges OpenClaw and Home Assistant. It uses the Model Context Protocol to give the agent structured access to HA entities, meaning the agent can list devices, read states, call services, and trigger automations through a well-defined interface rather than raw API calls.
If you are running the OpenClaw Home Assistant Add-On (which runs the OpenClaw gateway inside HAOS as a supervised container), the ha-mcp skill may already be available. For standalone OpenClaw installations running alongside HA on the same Pi or on a separate device, you install it manually.
Install the skill:
From the OpenClaw interface or CLI, install ha-mcp. The skill appears in the OpenClaw skills registry under the "smart home" category.
Configure the connection:
The skill needs two values:
- Your Home Assistant URL (typically
http://localhost:8123if both run on the same Pi, orhttp://<pi-ip>:8123if they run on separate devices) - The Long-Lived Access Token you created in the previous step
Add these to your OpenClaw configuration. The exact method depends on whether you use the Add-On (which provides a configuration UI) or a standalone install (where you set environment variables or edit a config file).
Verify the connection:
Once configured, test by asking the agent a simple question about your home state: "What lights are currently on?" or "What is the living room temperature?" If the skill is working, the agent will query HA entities and return real data from your devices.
The ha-mcp skill supports several categories of operations:
- Entity queries: List all entities, read the state of specific devices, check sensor values
- Service calls: Turn lights on/off, lock/unlock doors, adjust thermostats, activate scenes
- Automation triggers: Fire existing automations and scripts
- Scene management: Activate saved scenes through natural language
One limitation worth knowing: while the agent can trigger existing automations, creating new automations still requires editing YAML or using the HA UI. The agent is a controller, not a configuration tool. For complex conditional logic (if motion detected AND it's after sunset AND nobody is home, then...) you are better off writing that as a native HA automation and letting the agent trigger it.
Security Hardening for the Integration
Running an AI agent with access to your door locks, cameras, and thermostat demands serious attention to security. OpenClaw's default configuration has historically been too permissive, and security researchers have documented real-world exploits against unprotected instances.
In early 2026, Oasis Security disclosed a vulnerability called ClawJacked that allowed a malicious website to connect to a user's local OpenClaw instance, brute-force the administrator password, and seize full control. The issue was patched in version 2026.2.26, but it illustrates why hardening matters.
Here are the steps that make the biggest difference:
Run OpenClaw in a container. Docker or Podman isolation is the single most impactful improvement. If a skill or plugin behaves badly, container boundaries limit the blast radius. The HA Add-On already runs in a supervised container, which is one reason to prefer it over a bare-metal install.
Bind the gateway to localhost only. The OpenClaw gateway should listen on 127.0.0.1, not 0.0.0.0. If both HA and OpenClaw run on the same Pi, localhost binding is all you need. Security researchers found over 135,000 OpenClaw instances exposed to the public internet because gateways were bound to all interfaces with no authentication.
Set a gateway authentication token. Generate a strong token and require it for all gateway connections. This prevents anyone on your local network from connecting to the gateway without credentials.
Use a dedicated HA user with limited permissions. Instead of giving OpenClaw your admin token, create a Home Assistant user that can only access the rooms and device types the agent needs. If you only want voice control of lights and climate, do not give the agent access to locks, alarms, or cameras.
Be selective with skills. A security investigation in early 2026 found hundreds of malicious skills in the ClawHub registry, some containing credential-stealing malware. Install only the specific skills you need (ha-mcp for Home Assistant, for example), review their source code before installation, and avoid browsing the marketplace looking for things to try.
Keep OpenClaw updated. The ClawJacked patch in version 2026.2.26 is a good example of why this matters. Run the latest stable version and subscribe to the OpenClaw security advisories.
If you need remote access to your OpenClaw instance (to control your home from outside your network), use an SSH tunnel or Tailscale rather than exposing the gateway port through your router. Tailscale Serve keeps the gateway on loopback while handling secure access through its mesh network.
Practical Use Cases and Natural Language Examples
Once the integration is running, the value comes from how naturally you can interact with your home. Here are concrete examples of what works well.
Morning routines without YAML: Instead of writing an automation that fires at 6:30 AM to turn on the kitchen lights at 80% brightness, start the coffee maker, and set the thermostat to 22 degrees, you can tell the agent: "At 6:30 every morning, turn on the kitchen lights to 80%, start the coffee maker, and warm the house to 22." The agent triggers the appropriate HA services. For recurring routines, you still want to save these as native HA automations for reliability, but the agent makes prototyping and one-off commands effortless.
Device status checks: "Which doors are unlocked?" pulls state from every lock entity in your HA instance and returns a plain-language summary. This is faster than opening the HA app and navigating to the right dashboard.
Scene activation: "Movie time" can trigger a scene that dims the living room lights, closes the blinds, turns on the TV, and sets the soundbar to the right input. You define the scene once in HA and activate it through conversation.
Troubleshooting: "Why is the hallway light showing unavailable?" prompts the agent to check the entity state, report the last time it was reachable, and suggest whether the issue is a dead Zigbee battery or a lost network connection.
Multi-room control: "Turn off everything upstairs except the bathroom" requires the agent to understand your room/area hierarchy in HA and issue selective service calls. This works as long as your HA entities are organized into areas.
The SwitchBot AI Hub, announced in February 2026, takes this a step further. It is the first commercial device with native OpenClaw support, running the agent locally on the hub itself and connecting to SwitchBot's ecosystem of smart curtains, locks, plugs, humidifiers, and sensors. By late March 2026, SwitchBot plans to enable SwitchBot Skills through OpenClaw, letting you manage devices and automations through chat apps including WhatsApp, iMessage, and Discord.
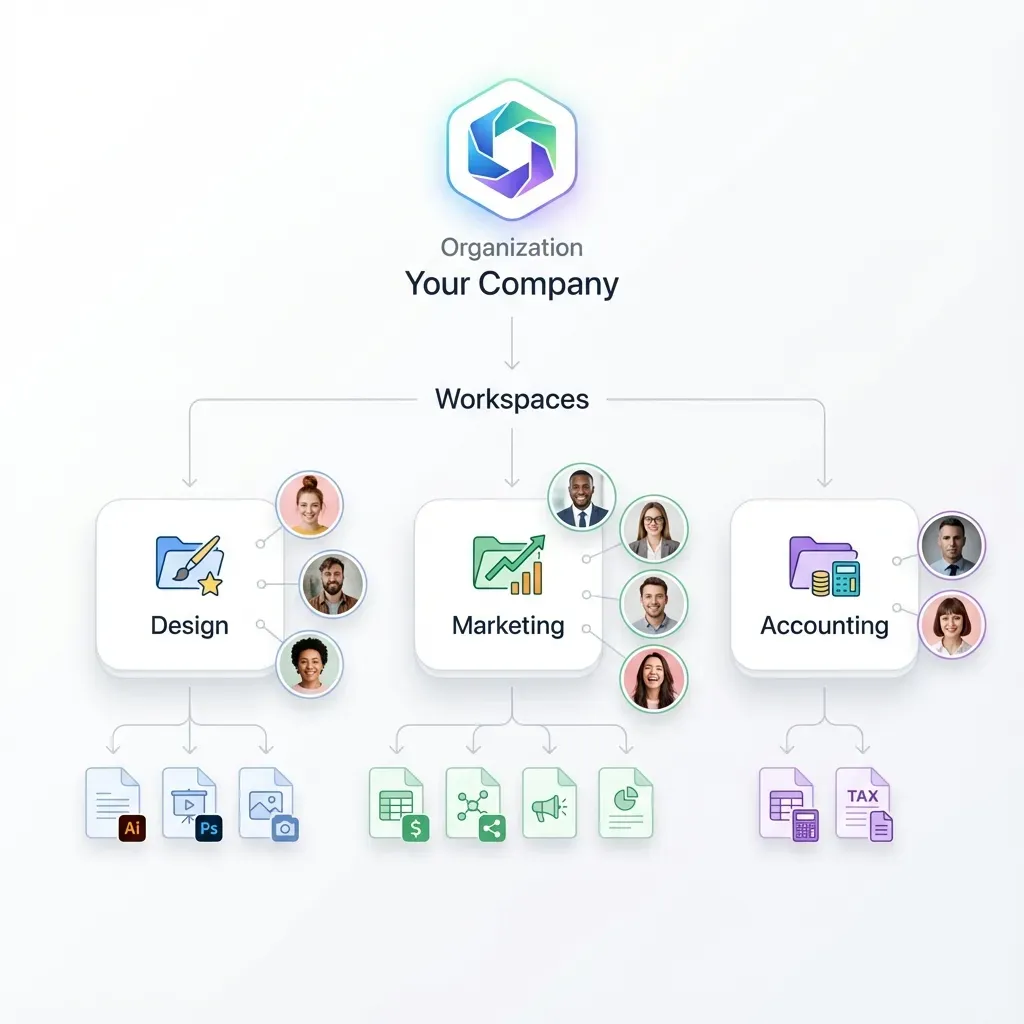
Storing and Sharing Configs with Fast.io
As your smart home grows, so does the configuration surface. HA automations, OpenClaw skill configs, custom prompt templates, device inventories, and troubleshooting logs all need to live somewhere accessible. If you run multiple agents or collaborate with other household members who tinker with the setup, local storage on the Pi becomes a bottleneck.
Fast.io workspaces give you a shared layer for this. Create a workspace for your smart home project, upload your configuration files, and any agent or human with access can pull the latest version. The free tier includes 50GB of storage, 5,000 AI credits per month, and 5 workspaces with no credit card required.
A practical setup looks like this: store your OpenClaw skill configurations, HA automation YAML exports, and device inventory spreadsheets in a Fast.io workspace. When you update an automation or add a new device, push the updated config to the workspace. If you run OpenClaw on multiple devices (a Pi for home, a mini-PC at a second property), both instances can pull from the same workspace to stay synchronized.
Fast.io's MCP server means your OpenClaw agent can interact with workspaces directly. The agent can upload logs, download configuration templates, or query workspace files through the same Model Context Protocol interface it uses for Home Assistant. Enable Intelligence Mode on the workspace and the files are automatically indexed for semantic search, so you can ask the agent "What automation controls the garage door?" and get an answer grounded in your actual config files, not a guess.
For teams or households with multiple people managing the smart home, Fast.io's granular permissions let you control who can read, edit, or share specific files. The audit trail tracks every change, so you can see who modified an automation and roll back if something breaks. When an agent builds a new configuration, ownership transfer lets you hand the workspace off to the person who will maintain it.
The alternative is scattering configs across the Pi's filesystem, a Google Drive folder, and a Discord channel. That works until the SD card fails, which it will eventually. Having a central workspace that both humans and agents can access reduces that fragility.
Frequently Asked Questions
How do I control Home Assistant with OpenClaw?
Install the ha-mcp skill in OpenClaw and configure it with your Home Assistant URL and a Long-Lived Access Token. The skill uses the Model Context Protocol to translate natural language commands into Home Assistant service calls, letting you control lights, locks, thermostats, and other devices through conversation.
Is OpenClaw compatible with Home Assistant?
Yes. OpenClaw connects to Home Assistant through the ha-mcp skill, which communicates via the HA REST API. It works with the Home Assistant Add-On (running inside HAOS) or as a standalone gateway connecting to HA over the network. Any device or integration exposed through Home Assistant is accessible to the agent.
Can OpenClaw create Home Assistant automations?
OpenClaw can trigger existing automations and scripts, activate scenes, and issue one-off service calls through natural language. Creating new persistent automations still requires the Home Assistant UI or YAML editor. The agent is best used as a controller and prototyping tool rather than a configuration manager.
Is OpenClaw Home Assistant integration secure?
It can be, but not with default settings. You should bind the gateway to localhost only, set a gateway authentication token, run OpenClaw in a container, use a dedicated HA user with limited permissions, and keep OpenClaw updated. The ClawJacked vulnerability disclosed in early 2026 showed what happens when instances are left exposed without authentication.
What hardware do I need for OpenClaw and Home Assistant on Raspberry Pi?
A Raspberry Pi 5 with 8GB RAM, an SSD or SD card (32GB minimum), a USB-C power supply, and a Zigbee coordinator if you use Zigbee devices. The total cost is under $100. The Pi runs both Home Assistant OS and the OpenClaw gateway, while cloud LLMs handle the actual language processing.
Does the Raspberry Pi run the AI model locally?
No. The Pi runs the OpenClaw gateway and Home Assistant, but the language model runs on a cloud provider (Anthropic, OpenAI, Google, or others). The Pi acts as a relay, which is why even a low-power board can handle the workload. Local LLM options exist for more powerful hardware, but a Pi does not have enough processing power for inference.
Related Resources

Give Your Smart Home Agent Persistent Storage
Fast.io workspaces let OpenClaw agents store configs, share automation files, and sync across devices. 50GB free, no credit card, with MCP access built in. Built for openclaw home assistant workflows.