Video Too Large to Email? 5 Easy Ways to Send It
When a video is too large to email, it exceeds the email provider's attachment limit (typically 25MB), requiring alternative sharing methods. Whether you're sending a 4K project file, client deliverables, or a quick phone clip, this guide covers five reliable ways to share videos of any size without losing quality or waiting hours for uploads.
Why Video Files Are Too Big for Email
Email was designed in the 1970s for text messages, not 4K video files. The protocol was built when a kilobyte was considered large, and while internet speeds have grown exponentially, email attachment limits have barely moved. Most providers like Gmail, Outlook, and Yahoo still cap attachments at 25MB. Apple Mail allows up to 20MB, and many corporate email servers enforce even stricter limits of 10MB or less.
To put that in perspective, here's what 25MB actually gets you in video:
- 1 minute of 1080p video at standard bitrate is roughly 175MB (7x the limit)
- 1 minute of 4K video at H.264 encoding is about 375MB (15x the limit)
- A 10-minute HD clip from a phone camera can easily exceed 1.5GB
- Professional codecs like ProRes can hit 1GB per minute of footage
The math simply does not work. Even a short iPhone clip from a birthday party will likely exceed what you can attach to an email. And the problem gets worse with professional video work. A wedding videographer delivering raw footage, a marketing team sharing a 30-second commercial for review, or a filmmaker sending dailies to a director all face the same fundamental problem: email was never designed to handle video.
Even if you somehow managed to squeeze a video under the limit, the recipient's inbox might still reject it. Many corporate email servers have even tighter restrictions, and some email clients struggle to display large attachments properly. The solution is not to chop your video into tiny pieces or aggressively compress it until it looks like a pixelated mess. Instead, you need tools that were actually built for moving large media files.
Method 1: Cloud Storage with Streaming (Best for Teams)
Cloud storage is how professionals share video today. Instead of attaching the file directly, you upload it once to a cloud platform and email a secure link. This approach bypasses size limits entirely and offers several advantages that email attachments simply cannot match.
How the process works:
- Upload your video to a cloud storage platform (Fast.io, Google Drive, Dropbox)
- Generate a shareable link with your preferred access settings
- Paste the link into your email, Slack message, or any other communication tool
- Recipients click the link to view or download the video
Why cloud sharing beats email attachments:
There are no size limits to worry about. Most cloud platforms support files from a few megabytes to hundreds of gigabytes. Quality stays intact because you upload the original file without any compression. Recipients can often preview the video without downloading it first, which is particularly helpful when someone just needs to review content quickly on their phone or laptop.
Security is also significantly better with cloud storage. You can password-protect links, set expiration dates so files are not accessible forever, restrict access to specific email domains, and revoke access instantly if you shared something with the wrong person. Email attachments, once sent, are completely out of your control.
The streaming advantage:
Not all cloud storage handles video equally. Traditional platforms like Google Drive often require the recipient to download the entire file before watching, or they show a degraded preview while "processing" the video for hours. This is frustrating when you just want someone to quickly review a 10-minute clip.
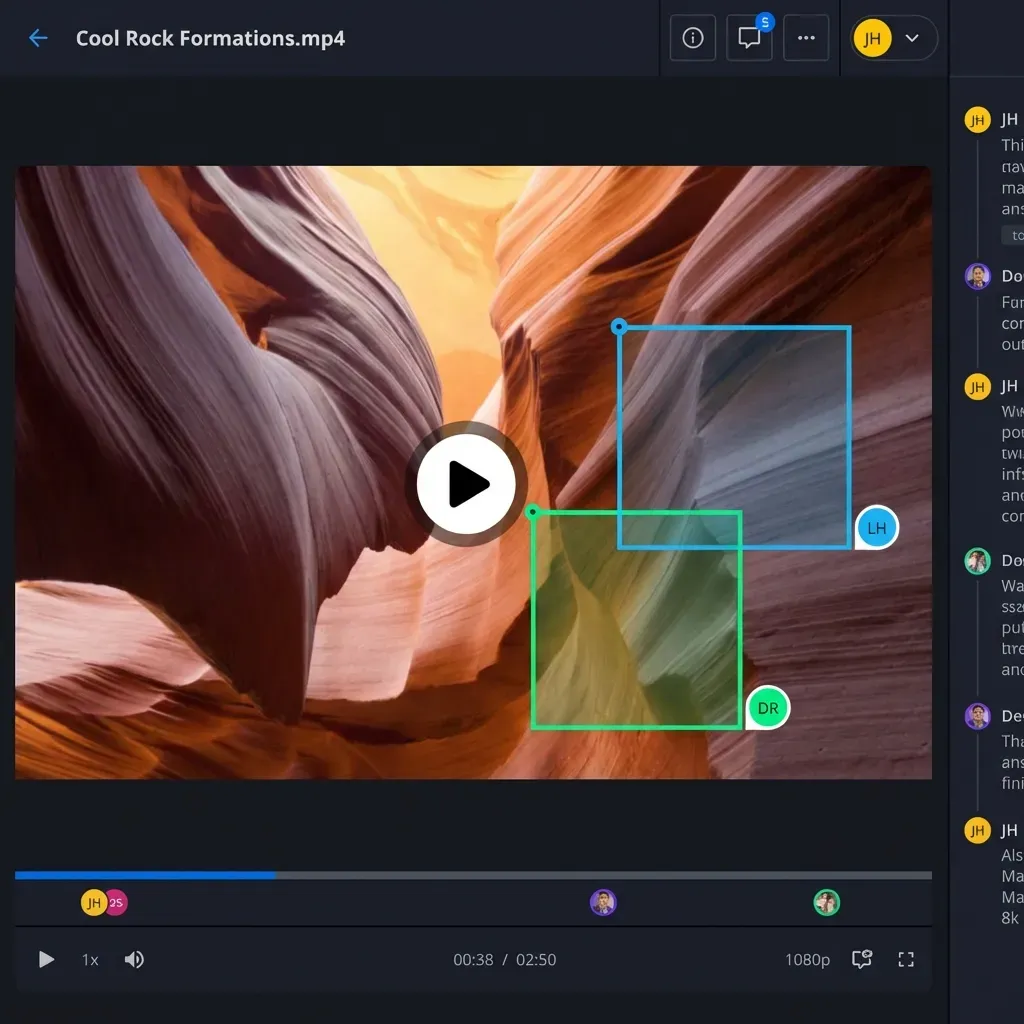
Platforms built for media, like Fast.io, use HLS streaming to deliver video. HLS (HTTP Live Streaming) is the same technology that Netflix and YouTube use. The video starts playing instantly, adapts to the viewer's internet connection, and allows smooth scrubbing through the timeline. No waiting, no buffering, no downloading a 2GB file just to watch the first 30 seconds.
For creative teams, production companies, and anyone regularly sharing video for review, the difference between "download and wait" and "click and watch" matters enormously. A client reviewing a rough cut can give feedback in minutes instead of waiting for a massive download to complete.
Method 2: File Transfer Services (Best for One-Off Sends)
If you need to send a video to someone once and do not need ongoing storage or organization, file transfer services offer a quick solution. These platforms are designed specifically for sending large files without the complexity of setting up folders, workspaces, or team permissions.
Popular transfer services include:
- WeTransfer: Free for files up to 2GB, no account required. Premium plans allow up to 200GB transfers.
- Smash: No file size limit on the free tier, though transfer speeds are slower without a paid plan.
- Filemail: Specialized for large media transfers with options up to 50GB on the free tier.
- MASV: Built specifically for video professionals, with fast upload speeds and pay-per-gigabyte pricing.
The workflow is straightforward. You drag your video file onto the website, enter the recipient's email address, and hit send. The service emails a download link directly to your recipient. No accounts, no folders, no setup.
The tradeoffs to consider:
Files typically expire after 7 to 14 days. If your client tries to download the video next month, the link will be dead. This makes transfer services unsuitable for archival purposes or any situation where someone might need access to the file again later.
Recipients usually have to download the full file before watching. On a mobile device with limited storage or a slow connection, downloading a 4GB video file is a painful experience. There's no streaming preview, no way to scrub through the timeline to find a specific moment, and no option to watch at lower quality to save bandwidth.
Transfer services also lack collaboration features. You cannot add comments to specific frames, see who has viewed the file, or organize multiple files into projects. They solve exactly one problem (getting a large file from point A to point B) and nothing more.
For freelancers delivering a final export to a client, or a friend sending vacation footage to family, transfer services work well. For ongoing projects with multiple stakeholders, you'll quickly outgrow them.

Method 3: Private Video Hosting on YouTube or Vimeo
YouTube and Vimeo are not just for public content. Both platforms allow you to upload videos as private or unlisted, sharing access only with specific people via a link or invitation. This approach works well when your goal is to show someone a finished video without requiring them to download anything.
How each platform handles privacy:
YouTube offers three visibility settings. Public videos are searchable and visible to everyone. Unlisted videos can only be accessed by someone with the direct link, but anyone with that link can view them. Private videos require the viewer to be logged into a Google account that you have explicitly added to the video's access list.
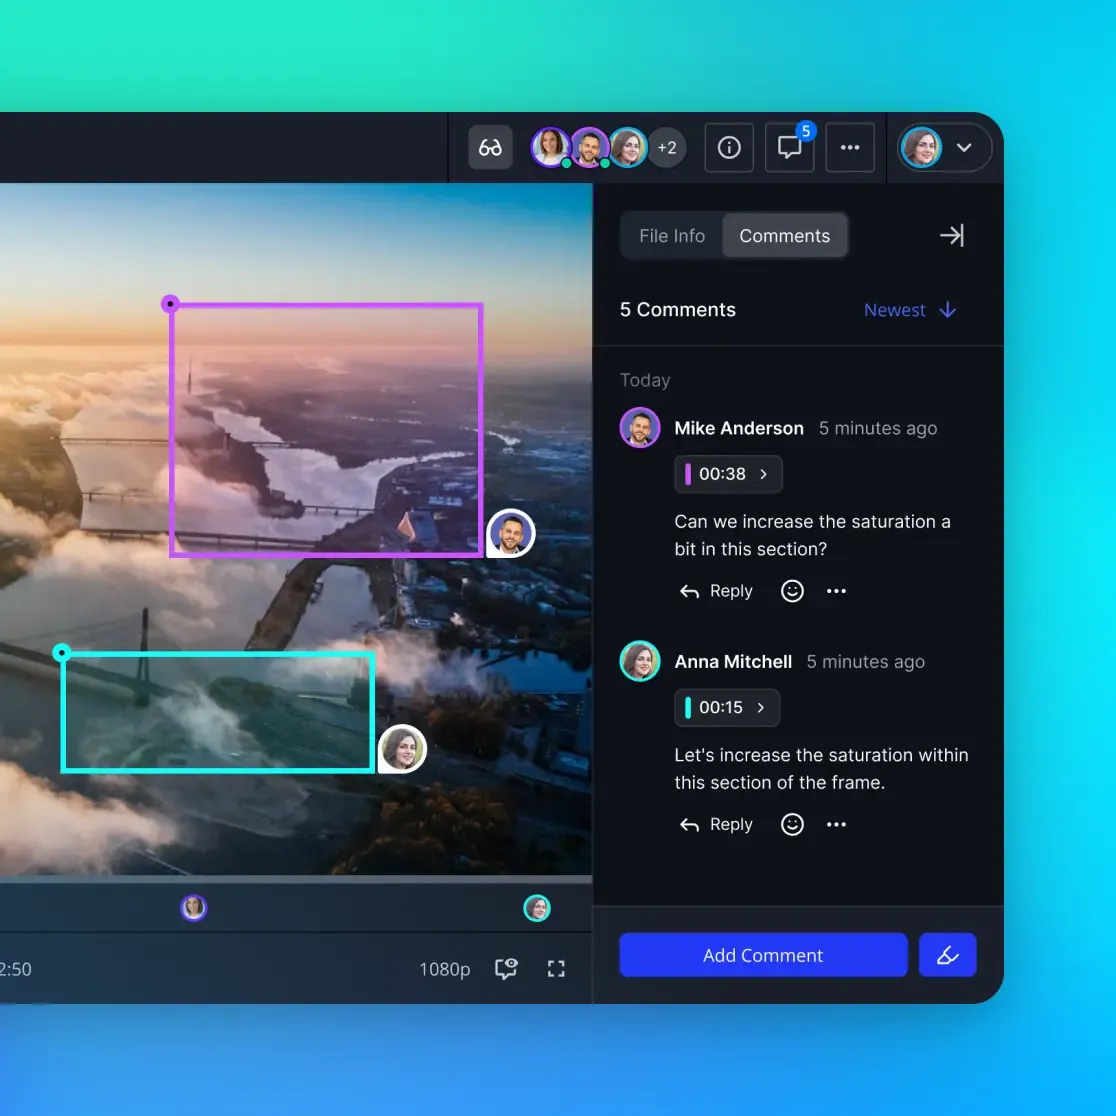
Vimeo provides more granular controls, especially on paid plans. You can require a password to view, restrict embedding to specific domains, hide videos from Vimeo's search and browse pages, and even disable downloads entirely. For client review scenarios, Vimeo's review tools allow timestamped comments directly on the video.
The significant drawbacks:
Compression is the biggest issue. YouTube aggressively compresses every upload to reduce bandwidth costs. Colors shift, fine detail gets lost, and banding appears in gradients. If you are sharing a color-graded commercial or a video with subtle visual effects, what the viewer sees may not represent your actual work. Vimeo is gentler with compression, but even their highest quality settings lose some information compared to the original file.
Downloading the source file is difficult or impossible. YouTube does not allow downloading of uploaded videos (outside of the original uploader downloading their own content). If your recipient needs the actual file to edit, insert into a presentation, or archive, they are stuck. Vimeo allows download options on some plans, but you have to enable it specifically.
Copyright detection systems can cause problems. Both platforms use automated systems to identify copyrighted music and content. A private video containing licensed music, stock footage you have rights to, or even incidental background music can get flagged, muted, or blocked. This happens automatically with no human review, and resolving disputes takes days.
Video hosting platforms make sense for showing finished work to an audience that just needs to watch. They are a poor choice for sending files that someone needs to download, review in detail, or work with further.
Method 4: Compress the Video File (Last Resort)
If you absolutely must send an email attachment and your file is only slightly over the limit (say, 30MB when the cap is 25MB), compression might be your only option. However, this approach comes with significant tradeoffs that make it unsuitable for professional use.
How video compression works:
Video files are already compressed using codecs like H.264, H.265, or ProRes. When you "compress" a video further, you are throwing away visual information to reduce the file size. This can mean lowering the resolution (1080p down to 720p or 480p), reducing the bitrate (less data per second means more artifacts and blockiness), or decreasing the frame rate.
Tools for video compression:
- HandBrake (free, open source): The go-to tool for re-encoding video with customizable quality settings
- Adobe Media Encoder: Included with Creative Cloud subscriptions, offers preset-based encoding
- FFmpeg (command line): Extremely powerful but requires technical knowledge
- VLC Media Player: Can re-encode files using the "Convert/Save" feature
Steps to compress a video:
- Open your compression tool and import the video file
- Select a lower resolution if the original is 4K or 1080p (720p often looks acceptable for review)
- Reduce the bitrate to 5-8 Mbps for HD content (the original might be 25-50 Mbps)
- Choose a fast preset to prioritize speed over quality, or slow for better quality at the same file size
- Export and check the resulting file size
Why compression should be avoided:
The process is destructive. Every time you re-encode a video, you lose quality that cannot be recovered. If the recipient needs to edit the footage, they are working with degraded source material. Colors shift, fine details become blocky, and motion can stutter.
Compression also takes time. Re-encoding a 10-minute 4K video can take 20 minutes to an hour depending on your computer. You're trading your time for marginal size reduction, when you could upload the original to cloud storage in the same amount of time.
The only scenario where compression makes sense is when the recipient specifically needs a smaller file (for example, to insert into a PowerPoint presentation) and does not care about maximum quality. For sharing work for review, delivering final assets, or archiving footage, compression is the wrong answer.
Method 5: Network File Sharing (For Local Transfers)
Sometimes you do not need to send a video over the internet at all. If you and your recipient are on the same local network (same office, same home WiFi, or connected via VPN), direct network file sharing is often the fastest option.
Built-in network sharing options:
On macOS, AirDrop provides fast, encrypted transfers between Apple devices. A 5GB video can transfer in under a minute when both devices are nearby. Windows uses SMB file sharing, where you can set up a shared folder that other computers on the network can access. Linux supports both SMB and NFS for network file sharing.
Setting up a shared folder:
- Create a folder on your computer designated for sharing
- Right-click the folder and enable sharing (on Windows) or use System Settings > Sharing on macOS
- Note the network path or computer name that others will use to access it
- On the other computer, connect to the shared folder using the file browser
When network sharing makes sense:
The primary advantage is speed. Gigabit ethernet connections (common in offices) can transfer files at 100MB per second or faster, ten times faster than most internet upload speeds. USB 3.0 external drives can be even faster at 400-500 MB per second.
There are no upload or download time costs. The file moves directly from one computer to another with no intermediate server. For a video editor handing off footage to a colorist in the same building, this is often the right approach.
The limitations:
Both parties must be on the same network or connected via VPN. This rules out sharing with clients, remote collaborators, or anyone outside your immediate location. The recipient needs to know how to access network shares, which can be confusing for non-technical users. And there is no security beyond the network itself, meaning no password protection, access logging, or expiration dates.
Network file sharing works best for in-house transfers where speed matters more than convenience. For everything else, cloud storage remains the better option.
Choosing the Right Method for Your Situation
Each method has ideal use cases. Here is a breakdown to help you decide quickly:
Use cloud storage with streaming when:
- You share video regularly with clients or teammates
- Recipients need to preview or review without downloading
- You want to track who has accessed the file
- Files need to remain accessible for weeks or months
- Quality preservation matters (no re-encoding)
Use file transfer services when:
- This is a one-time send with no future access needed
- You do not need organization or collaboration features
- The recipient is comfortable with large downloads
- Speed of setup matters more than long-term access
Use private video hosting when:
- The recipient only needs to watch, not download
- Some quality loss is acceptable
- You want viewing analytics (Vimeo especially)
- The video does not contain copyrighted material that might trigger automated blocks
Use compression when:
- The file is only slightly over the email limit
- Quality is not critical (rough draft, reference footage)
- The recipient specifically needs a smaller file
- No other option is available
Use network sharing when:
- Both parties are on the same physical network
- Speed is the top priority
- There are no remote collaborators involved
For most professionals who share video regularly, cloud storage with streaming support is the clear winner. Your original quality stays intact, videos play on demand without download delays, and your files have a permanent home that you control. The convenience gap between sending a link and asking someone to download a multi-gigabyte file is enormous, especially when working with clients who are not technically sophisticated.
Frequently Asked Questions
How do I send a video that is too large for email?
The most reliable method is to upload the video to a cloud storage service like Fast.io or Google Drive and email a shareable link instead of the file itself. This bypasses attachment limits entirely and lets recipients preview the video without downloading. For one-time transfers, services like WeTransfer can send files up to 2GB for free.
What is the maximum video size for email attachments?
Most email providers (Gmail, Outlook, Yahoo) limit attachments to 25MB. Apple Mail caps at 20MB, and corporate email servers often enforce stricter limits of 10MB or less. In practical terms, this means about 5-10 seconds of 4K video or 20-30 seconds of 1080p video at standard bitrate.
How can I send a video without losing quality?
Avoid messaging apps and email attachments, which often compress video automatically. Instead, use a cloud storage platform that preserves the original file and share via a download link. Fast.io, Google Drive, and Dropbox all maintain original quality. If the recipient only needs to watch (not download), choose a platform with HLS streaming for the best viewing experience.
Why is my video file 1GB or more?
File size depends on resolution, frame rate, and codec. A 4K video at 60fps in a professional codec like ProRes can exceed 1GB per minute. Standard 1080p at 30fps using H.264 runs about 150-200MB per minute. High bitrate, low compression, and long duration all increase file size. This is normal for high-quality video and is not something that can be avoided without sacrificing quality.
Can I zip a video to make it small enough to email?
Zipping rarely helps with video files. Formats like MP4, MOV, and MKV are already heavily compressed, so zipping them typically reduces size by only 1-2%. You might save a few megabytes on a 100MB file, which is not enough to fit under a 25MB limit. Zipping also adds an extra step for the recipient who must unzip before watching.
How long does it take to upload a large video file?
Upload time depends on your internet connection's upload speed and the file size. On a typical home internet connection with 10 Mbps upload, a 1GB file takes about 15 minutes. On fiber with 100 Mbps upload, the same file takes under 2 minutes. Most cloud services show progress indicators, and some (like Fast.io) continue uploads even if you close the browser tab.
What is HLS streaming and why does it matter for video?
HLS (HTTP Live Streaming) is a protocol that breaks video into small chunks and delivers them adaptively based on the viewer's connection speed. Instead of downloading the entire file before watching, playback starts immediately and quality adjusts in real-time. This is the same technology Netflix and YouTube use. For sharing large video files, HLS means recipients can start watching instantly without waiting for a multi-gigabyte download.
Related Resources

Send videos of any size
Stop worrying about email limits. Upload, stream, and share massive video files instantly with Fast.io.